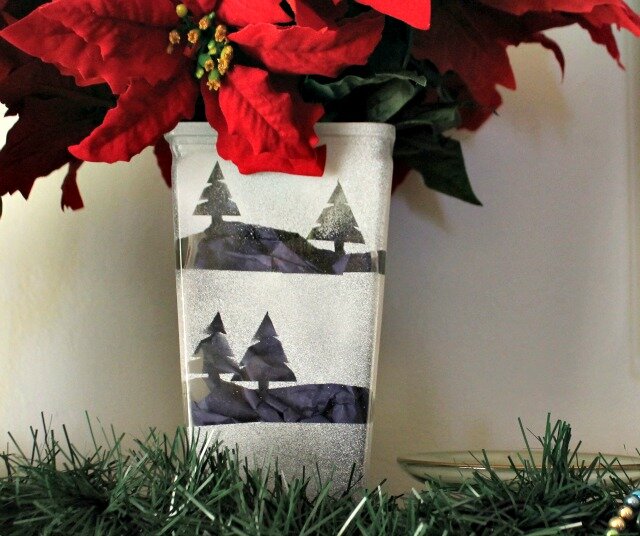

Here’s a really simple project that you can make to dress up your winter mantel or table. You can customize it to show different winter scenes or just add a couple of simple pine trees like the one shown here.
DIY Winter Vase – what you need:
- plain glass vase
- painter’s tape
- scissors
- white spray paint
- tissue paper, rocks or other filler
- flowers (real or fake)


Step 1: Create a winter scene with tape
Start with a clean vase. Then use your scissors to cut out trees and other wintery elements to put around the vase. In the one shown, I ripped small slivers of tape and put them around the vase horizontally, to create three separate layers on the vase. Then I cut tree shapes and placed them around each layer.
Step 2: Paint
Once all the tape is secure, take the vase outside or to a well ventilated area and add a very light layer of white spray paint. Don’t completely cover the glass but just lightly go over it so that it looks like snow.
Step 3: Remove tape
When the paint has completely dried, remove the tape and make sure you can see all of the outlines you made with the tape.
Step 4: Fill the vase
Then the vase itself is done! You can fill it with real flowers or fake poinsettias like the ones shown. If you use fake flowers, consider using tissue paper, rocks or some kind of filler to really offer some contrast to the white paint. Then just put it out on display for the winter!